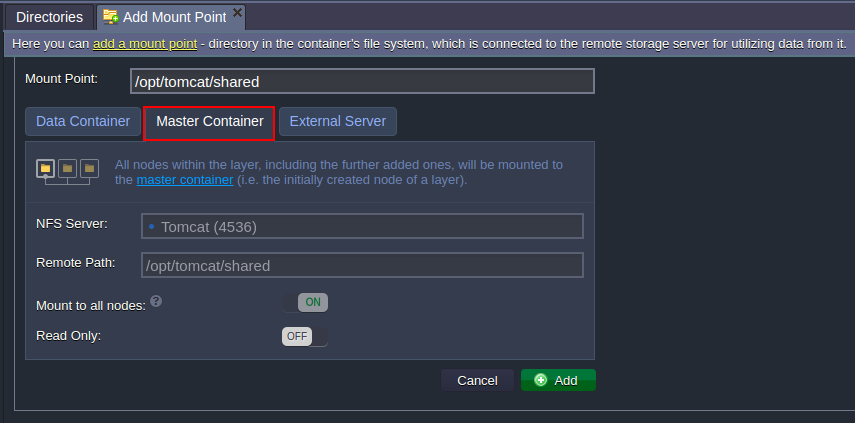
The Master Container mount option is devoted to sharing content among the same-typed nodes of a single layer. Here, the initially created container, so-called “master node”, will handle the defined data for all other nodes on a layer.
1. Within the Add Mount Point form, you’ll see the required Master Container tab being opened by default.

- Mount Point - path to the folder on the master container, that will be shared among all nodes of a layer (it will be also automatically used as a Remote Path on clients)
-
Read Only - turn the switcher on to restrict the mounted data editing at client nodes (by default, the read & write rights are provided)
The rest of the data will be fetched and substituted automatically, so just click Add.
Please be aware that if creating an environment with several same-type nodes at a time (i.e. but not adding them subsequently), a master container of a layer is selected randomly. Thus, it won’t be obligatory assigned the lowest Node-ID - consider this while performing any manual management operations.
The exact master node identifier can be seen within the NFS Server field of the above-shown frame.2. In a moment, the corresponding record will appear in the list of your mount points at client nodes and within the exports section of the master container.
Now, you can start utilizing the connected folder as your data storage for the layer - for example, try to create a few files/directories inside it and check their availability on all of the rest nodes.

