The most common example of data mounting is when both client and server are located within the same Apiqcloud platform.
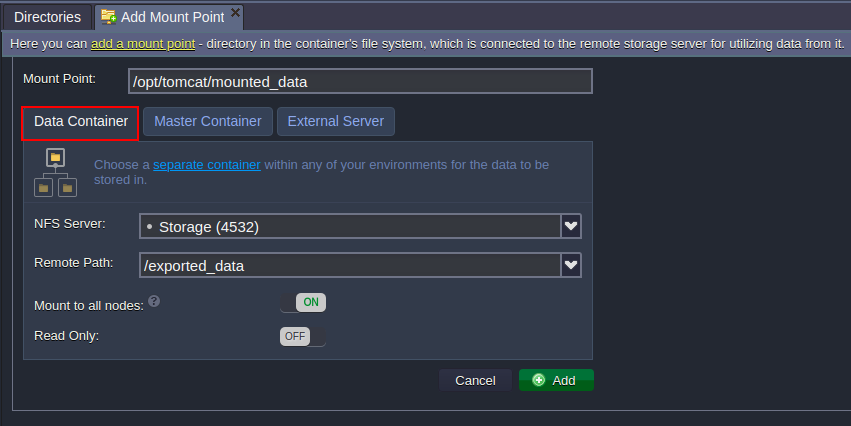
1. In the Add Mount Point frame, switch to the Data Container tab and fill in the required fields.

Here, the following parameters should be defined:
Mount Point - path to the local folder the mounted content will be displayed at
Note:
- if the specified directory doesn’t exist, it will be created automatically
- path can’t start with /proc, /dev, /sys, /run or be equal to the following: /, /bin, /lib, /lib64, /lib32, /usr, /usr/bin, /usr/sbin, /usr/lib or /usr/lib64 (this list may vary based on your provider’s settings)
- NFS Server - expandable list of nodes on your account which can be used as a data storage container
Note: It is not allowed to mount data from the same node you’ve exported it to the current container, i.e. to create cross-mounts. This also includes a restriction on building a closed circle of mounts by means of intermediate nodes.
- Remote path - the required directory location at a remote container (you can either type it manually or choose one of the favorite paths on that node from the automatically fetched drop-down list)
- Mount to all nodes - switcher to set the same mounts to be added for all nodes within a layer (including those that could be added further as a result of horizontal scaling)
-
Read Only - turn the switcher on to restrict the mounted data editing at client nodes (by default, the read & write rights are provided)
Click Add to proceed.
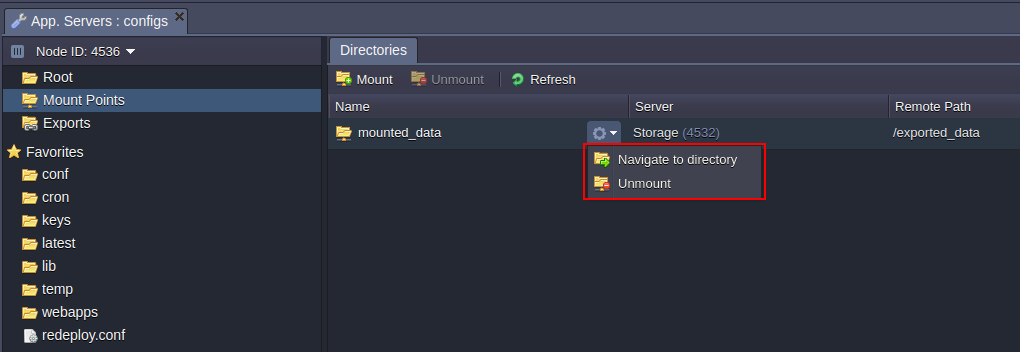
2. In a moment your mount point will be created and added to the list. So, you can either Navigate to the directory (double click on the corresponding record) or Unmount it (with the same-named button at the tool pane) when it becomes unnecessary.

Also, both of these actions are available by means of the Additionally list for every mount.
3. Upon navigating inside, you’ll see the same content as on your storage.

Due to the configurations, stated in this example (namely - the enabled Mount to all nodes option and disabled Read Only one), the mounted content should be available and editable at all containers of the layer. You can check this through switching among nodes using the drop-down list at the left-hand menu (circled above).

