Setting Up Cronjob
Cron is the time-based job scheduler in Unix-like computer operating systems. Cron enables users to schedule jobs (commands or shell scripts) to run periodically at certain times or dates. It is commonly used to automate system maintenance or administration, though its general-purpose nature means that it can be used for other purposes, such as connecting to the Internet and downloading emails.
Apiqcloud gives you a possibility to run your programs at specified time with a help of cron, which receives your instructions and performs any tasks following the derived scenarios. You can use this opportunity to perform periodic tasks, e.g.:
- logs clearing
- backing up
- scripts running
Check out the example below.
Create the environment
- Log into Apiqcloud dashboard and click on Create environment button.

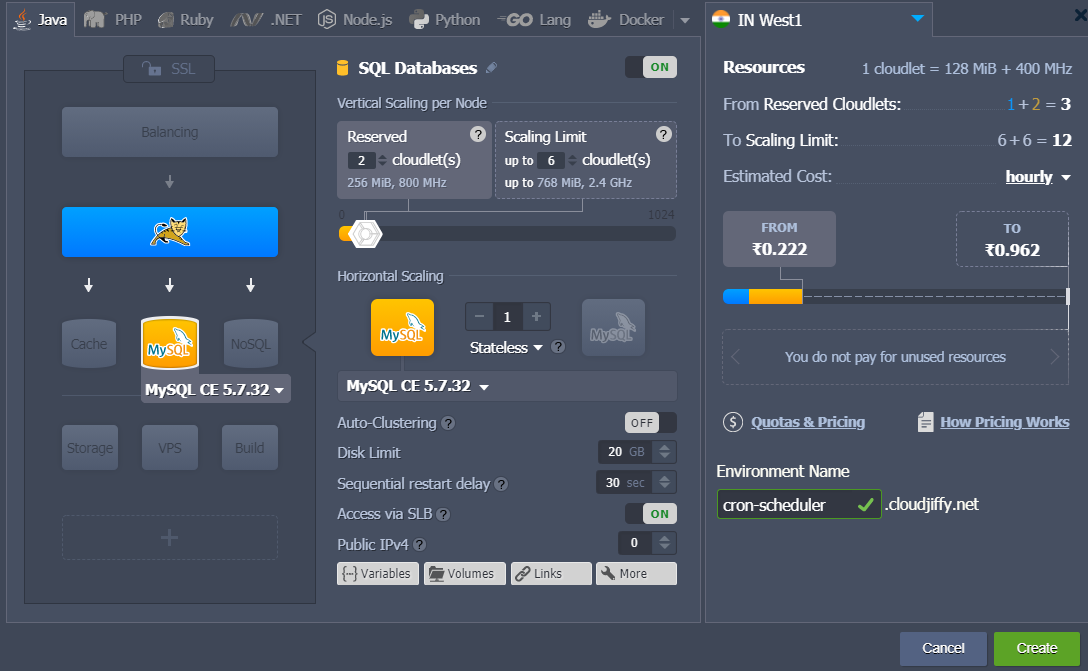
- In the Environment topology window choose the application server and database you want to use (for example, Tomcat and MySQL). Type the name of the environment and click Create.

In a minute your environment with both Tomcat and MySQL nodes will be created.
Upload Script
Application Server
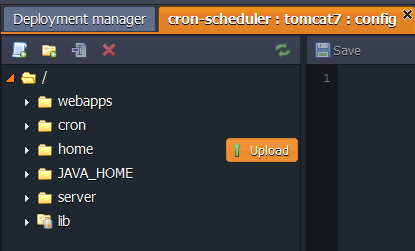
1. Click the Config button for your application server.

2. Upload scripts you want to run to the following folder:
- home - if you use Java server in your environment (as we do in this instruction)
- the folder where your application is stored - if you use PHP server in your environment

Database
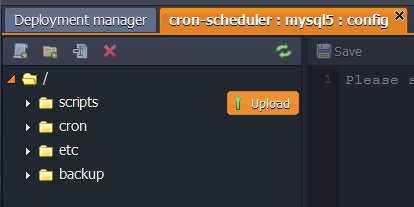
1. Click the Config button for your database (MySQL or MariaDB).

2. Upload the scripts you want to perform to the scripts folder.

Cron Event Scheduler
- In the already opened configurations tab navigate to the cron folder and open the {nodeName} file.

2. Here you can write all necessary commands to schedule your tasks. They should be composed in a way so that crontab will understand them. The basic format of a crontab schedule consists of 6 fields separated by spaces.
|
|
| Field | Range of values |
|---|---|
| minute | 0-59 |
| hour | 0-23 |
| day | 1-31 |
| month | 1-12 |
| day-of-week | 0-7 (where both 0 and 7 mean Sun, 1 = Mon, 2 = Tue, etc.) |
| command-line-to-execute | the path to the program you want to run |
While stating these values you need to follow the next standards:
- The fields have to be in that exact order, with no empty or missing fields.
- If needed you can use a wildcard character - “*” (the asterisk). In a crontab file it represents every possible value for the field. For example, specifying “*” in the “hour” field means “to run every hour”.
- The “/” character is used to specify additional frequency assignments. For example, “* / 3” in the “hour” means “every three hours”.
- For each individual parameter, you can specify multiple values separated by commas. For example, if in the “hour” you type “1,6,19”, the job will run “at 1:00, at 6:00, and 19 hours”. You can also specify the interval, for example, “8-17” would mean that the program will be run “every hour from 8 to 17 inclusive”.
Pay attention that you should specify a full path to your script in the cron command. Depending on the location of your script the path can be as one of the following:
- home folder for Java compute nodes:
- /opt/tomcat/temp/{scriptName} - Tomcat, TomEE
- /opt/jetty/home/{scriptName} - Jetty
- /opt/glassfish3/temp/{scriptName} - GlassFish
- folder with your application files & scripts for PHP compute nodes:
- /var/www/webroot/{appFolder}/{scriptName}
- scripts folder for MySQL/MariaDB databases:
- /var/lib/jelastic/bin/{scriptName}
3. For example, if your script is located in the home folder of Tomcat and you want it to be performed every minute, your command line can look like this example:
|
|

Tip: If your script does not have executable flag and you use built-in interpreters, such as Bash, Perl, Python, SED, AWK or Expect (depending on your script), you should add the following paths after time settings for explicit specifying the interpreter:
- /bin/bash - for Bash
- /usr/bin/python - for Python
- /usr/bin/perl - for Perl
- /bin/sed - for SED
- /bin/awk - for AWK
- /usr/bin/expect - for Expect
- /usr/bin/php - for php-interpreter
In this case your command will be as following:
|
|

4. Please make sure there is a blank line after the last cronjob entry.
5. Save the changes in order to apply the settings.
That’s all. As you can see, it is pretty easy to schedule your tasks with Apiqcloud. Enjoy!
Cronjob is a nifty tool to prevent problems from occurring and provide you with peace of mind. As you see, it is very easy to schedule your tasks with Apiqcloud new feature. Enjoy!

